Fridge magnets
3D-printed magnet
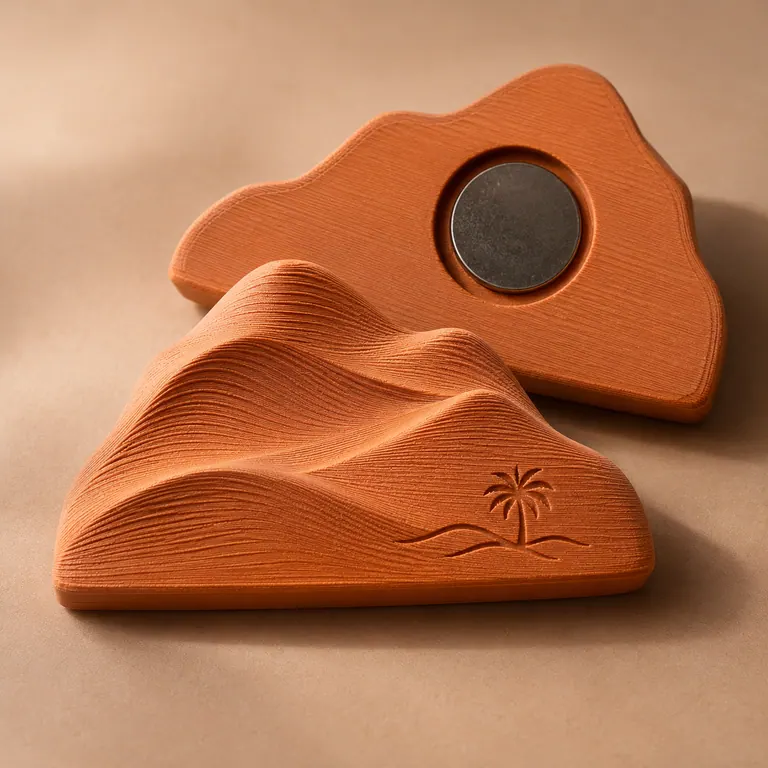
A printed relief adds depth to the design. Specify the overall thickness, face colours and backs where magnets can be fitted.
Read product details & FAQsEach order is custom quoted. Send your quantity, specifications and required date for pricing and production time.
Request this quote on WhatsAppWhat to include in your brief
- Shape & backing
- Finished outline, dimensions and backing preference
- Artwork & personalisation
- Upload a photo or illustration and indicate the crop. For a custom outline, include the cut shape.
How to request this product
Enter your quantity and preferred date in the quote form. Upload a PDF, PNG or JPEG up to 3 MB. The studio will review the artwork, price and timing with you.
Product details
3D-printed magnet
A dimensional magnet uses physical steps or sculpted contours to bring an icon forward from its background. Broad shapes are easier to read by touch and sight than a crowded miniature scene. The profile also affects how far the piece projects from the surface.
Before you order
Provide a front view and a side sketch showing the tallest raised feature and the flat area intended for the magnetic backing.
Product FAQs
How do I turn a flat illustration into a raised magnet?
Mark which parts form the base, which sit above it and which details can be left out at a small scale. Request a sample side view to review the depth.
How do I choose a rigid, flexible or raised magnet?
A rigid face frames a photo or badge. A flexible sheet follows a cut outline and keeps a low profile. A raised design gives a souvenir more depth. Identify where it will be displayed and whether each piece will be mailed.
How much space should I leave on a backing card for a souvenir magnet?
Start with the magnet’s widest and tallest points. Mark the shop display hole, any clear sleeve and the printed message on a sketch. Ask to see the assembled dimensions before approving the card.
What should I check on a photo magnet proof?
Look at the crop at the actual finished size, particularly around faces and text. Keep important details away from rounded corners and show which way the image should face when displayed.